Additional VBA string functions
Each programming language has a native set of functions which is "complete" in the sense that it allows the user to produce any result he may require. Languages may differ in both the names given to functions - following certain traditions- but also in the arguments available to tweak the result. Some functions are available in one language but not in others. The Code VBA add-in adds some functions which are available in other languages such as VB.NET, these are introduced here. To indicate that they concern String functions, their names have been prefixed by 'String'
StartsWith
Tests if a String begins with a substring.
Public Function StringStartsWith(Expression As String, Find As String, _
       Optional Compare As VbCompareMethod = vbBinaryCompare) As Boolean
    'Returns boolean value indicating whether the inputstring starts within
     ' a certain string or not.'
    '?StringStartsWith("abcd","ab") > True'
    '?StringStartsWith("abcd","b") > False'
    '?StringStartsWith("b","ab") > False'
    '?StringStartsWith("b","ba") > False'
    '?StringStartsWith("abcd","") > True maybe better to raise error'
    'Err.Raise 5, "StartsWith", "Invalid procedure call"'
    StringStartsWith = InStr(1, Expression, Find, Compare) = 1
End Function
From the Code VBA toolbar, select VBA » String » Fragments »
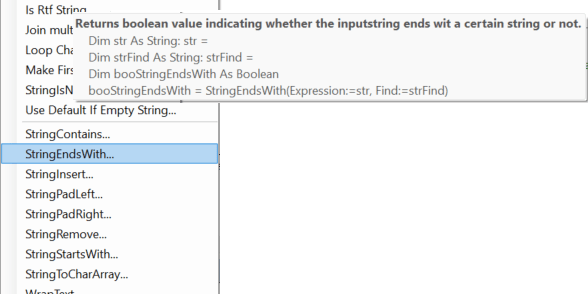
EndsWith
Determines whether the end of the specified string matches the specified character
Public Function StringEndsWith(Expression As String, Find As String, _
            Optional Compare As VbCompareMethod = vbBinaryCompare) As Boolean
    'Returns boolean value indicating whether the inputstring ends wit a
    ' certain string or not.'
    '?StringEndsWith("abcd","cd") > True'
    '?StringEndsWith("abcd","cD") > False'
    StringEndsWith = InStrRev(Expression, Find, -1, Compare) = Len(Expression) - Len(Find) + 1
End Function
Contains
Tests if a string, cell or range contains the substring you want to find
Public Function StringContains(Expression As String, Part As String, _
            Optional Compare As VbCompareMethod = vbBinaryCompare) As Boolean
    'Returns a value indicating whether a specified (sub-)string occurs within this string.'
    '?StringContains("ab", "d",vbBinaryCompare) > False'
    '?StringContains("ab", "b",vbBinaryCompare) > True'
    '?StringContains("ab", "a",vbBinaryCompare) > True'
    '?StringContains("abcd", "bc",vbBinaryCompare) > True'
    StringContains = (InStr(1, Expression, Part, Compare) >= 1)
End Function
Insert
Returns a new string in which a specified string is inserted at a specified index position in the original string
Function Insert(Expression1 As String, startIndex As Long, Expression2 As String) As String
    'Returns a new string in which a specified string is inserted at a specified index position
    '    in the input string.'
    '?Stringinsert("abc",1,"xy") > xyabc'
    '?Stringinsert("abc",2,"xy") > axybc'
    '?Stringinsert("abc",3,"xy") > abxyc'
    '?Stringinsert("abc",4,"xy") > abcxy'
    '?Stringinsert("abc",0,"xy") > error 5 Invalid procedure call'
    '?Stringinsert("abc",5,"xy") > error 5 Invalid procedure call'
    'to make forgiving, uncomment below lines'
    'If StartIndex < 1 Then StartIndex = 1'
    'If Len(Expression1) < StartIndex Then StartIndex = Len(Expression1) + 1'
StringInsert = Mid(Expression1, 1, StartIndex - 1) & Expression2 & Mid(Expression1, _
                                     StartIndex, Len(Expression1) - StartIndex + 1)
End Function
Remove
Removes the specified number of substrings from the string beginning at the start of the string
Public Function StringRemove(Expression As String, Find As String, Optional Start As Integer = 1, _
                        Optional Count As Integer = 1) As String
    'Returns a new string in which a specified number of characters from the current string are deleted.'
    'Removes substring from string using and analogous to VBA Replace function:'
    'first the replace is done, then substring is created based on Start'
    '?StringRemove(Expression:="abab", Find:="b") > aab'
    '?StringRemove(Expression:="abab", Find:="b", Count:=2) > aa'
    '?StringRemove(Expression:="abcb", Find:="b",Start:=1) > acb'
    '?StringRemove(Expression:="abcb", Find:="b",Start:=2) > cb'
    '?StringRemove(Expression:="abcb", Find:="b",Start:=1, Count:=2) > ac'
    StringRemove = Replace(Expression:=Expression, Find:=Find, Replace:=vbNullString, Start:=Start, _
                                                                        Count:=Count)
End Function
PadLeft
Returns a new string of a specified length in which the beginning of the current string is padded with spaces or with a specified Unicode character
Public Function StringPadLeft(Expression As String, width As Integer, Optional Char As String = " ")
    'Returns a new string of a specified length in which the beginning of the current string is
    ' padded with spaces or with a specified character.''
    '?StringPadLeft("abc",6,"x") > xxxabc'
    '?String"|" & PadLeft("abc",6) > |   abc'
    StringPadLeft = Right(String(width, Char) & Expression, width)
End Function
PadRight
Returns a new string of a specified length in which the end of the current string is padded with spaces or with a specified Unicode character
Public Function StringPadRight(Expression As String, length As Integer, Optional Char As String = " ")
    'Returns a new string of a specified length in which the end of the current string is padded
    ' with spaces or with a specified character.'
    '?StringPadright("abc",6,"x") > abcxxx'
    StringPadRight = Left(Expression & String(length, Char), length)
End Function
ToCharArray
Copies the characters of a string to a Unicode character array.
Public Function StringToCharArray(Expression As String) As Variant
    'Copies the characters in this instance to an array.'
    'arr = ToCharArray("abcd"): For i = LBound(arr) To UBound(arr): ?arr(i): Next'
    Dim arr As Variant 'array
    Dim i As Integer
    ReDim arr(Len(Expression) - 1)
    For i = 1 To Len(Expression)
        arr(i - 1) = Mid$(Expression, i, 1)
    Next
    StringToCharArray = arr
End Function
IsNullOrEmpty
Indicates whether the specified string is vbNullString or an empty string ("") or not. This function in not included - instead you can use from the same menu the fragment 'Is Length Greater Than 0' which inserts the revers but corresponding simple code, just change > to =.
= (Len() > 0)
If you use the fragment in a condition position such as If ... Then, this will result in the
intended
If (Len( with a selected string inserted at the ⟨String⟩ position
IsNullOrWhiteSpace
Indicates whether the specified string is vbNullString or an empty string ("") or only Whitespaces or not.
Note that vbTab is not considered in this implementation
= (Len(Trim()) = 0)
IndexOf and LastIndexOf
Reports the one-based index position of the first or last respectively occurrence of a specified Unicode character or string within this instance. The method returns 0 if the character or string is not found
In VBA IndexOf is called InStr
In VBA LastIndexOf is called InStrRev
Substring
There is no full equivalent for VB.NET String.Substring. The most close somes the Mid function. Other procedures to get substrings
are Left and Right.
Concat
Having a special function for concatenation is harly useful considering the simple & operator - see Concatenation
Compare
Apart from the common comparision operators which can be used to compare string, = and ⟨⟩, the equivalent for VB.NET String.Compare is the StrComp function explained here....